I’ve made Hingagyi dozens of times in my Dallas kitchen, and I can tell you this: it’s not as complicated as you think.
You’re probably here because you want to make authentic Burmese sour curry at home but aren’t sure where to start. Maybe you’ve seen recipes that seem intimidating or skip the details that actually matter.
Here’s the thing: Hingagyi relies on a few key ingredients and a specific technique. Get those right and you’ll have a curry that tastes like it came straight from a Burmese kitchen.
I’ve spent years cooking international dishes and learning what makes them work. This guide strips away the confusion and focuses on the Hinga flavors and traditions that make this curry special.
How to make Hingagyi is exactly what you’ll learn here. I’ll walk you through the essential ingredients, the cooking process, and the small details that turn a good curry into something memorable.
No fancy equipment needed. No hard-to-find substitutions that change the whole dish.
Just a straightforward method that gets you to an authentic result. The kind of Hingagyi you’d be proud to serve.
Understanding Hingagyi: More Than Just a Curry
Most people think all curries are the same.
Thick. Creamy. Heavy on the coconut milk.
But Hingagyi? It’s nothing like that.
This Burmese dish breaks every rule you know about curry. Instead of that rich, gravy-like consistency, you get something light and brothy. Almost soup-like (but calling it soup doesn’t do it justice).
The flavor hits different too.
You know that sour punch from tamarind? That’s your first note. Then comes the deep savory backbone from fish paste or soy sauce. Turmeric and chili round it out with warmth and a gentle kick.
It’s balanced in a way that makes you want another spoonful.
Now, here’s what I recommend if you’re new to this. Start with the fish version. It’s the most traditional and gives you the clearest sense of what Hingagyi should taste like. Once you understand how to make hingagyi with fish, you can branch out.
Because the dish is versatile.
You can swap fish for pork if you want something heartier. Or go with vegetables for a lighter meal. The core stays the same. That sour, savory, aromatic base is what defines it.
What matters most is getting that broth right. Too thick and you’ve made a different dish entirely. Too thin and you lose the body that makes each bite satisfying.
The Pantry: Sourcing Your Authentic Hingagyi Ingredients
Let me be straight with you.
You can’t make real hingagyi without the right ingredients. I’ve seen people try to shortcut this and wonder why their soup tastes flat.
Here’s what you actually need.
The Non-Negotiables
Start with your protein. Traditionally we use fish like catfish or pork belly. Why these? Catfish has a mild flavor that doesn’t fight the broth. Pork belly brings fat that makes everything richer. Both break down beautifully after simmering.
Tamarind pulp is your sour note. If you buy a block, soak a golf ball sized chunk in warm water for 15 minutes and squeeze it through your fingers. Strain out the seeds and fibers. Concentrate works too but use less (it’s stronger than you think).
Now here’s where people get nervous.
Ngapi is fermented fish paste. It smells strong. Really strong. But it’s the umami backbone of hingagyi. Without it, you’re making soup, not hingagyi.
If you can’t handle ngapi, use high quality fish sauce instead. Or add a small pinch of MSG (which is just concentrated umami anyway).
Your aromatics matter. Onion, garlic, ginger, and fresh turmeric. Fresh turmeric is worth hunting down. It gives you that vibrant yellow color and an earthy flavor that ground turmeric can’t match.
Vegetable Components
I like adding gourd, radish, or green beans. They soak up the broth and give you different textures in each bite. Plus they make the soup feel more complete.
Sourcing Tips
Hit your local Asian supermarket first. Most carry tamarind pulp and ngapi in the Filipino or Southeast Asian section.
Can’t find them locally? Order online from importfood.com or templeofthai.com. I’ve used both and they ship fast.
Here’s my prediction. Within five years, ngapi will show up in mainstream grocery stores as fermented foods keep gaining traction. But until then, you’ll need to seek it out.
Learning how to make hingagyi means respecting these ingredients. Each one plays a role you can’t fake.
The Step-by-Step Guide to Perfect Hingagyi
You want to know how to make hingagyi that actually tastes right.
Not some watered-down version. The real thing.
I’m going to walk you through it the way I learned. Each step matters, and I’ll tell you exactly why.
Step 1: Prep Your Ingredients
Get everything ready before you turn on the heat.
Chop your onions fine. Mince the garlic and ginger until they’re almost paste-like. If you’re using fresh turmeric, grate it now (your cutting board will turn yellow, but that’s just part of it). Prepare your tamarind water by soaking a walnut-sized piece in warm water for ten minutes, then squeeze and strain it.
Cut your protein into bite-sized pieces. Prep your vegetables but keep them separate based on cooking time.
This isn’t busy work. When the pan gets hot, things move fast.
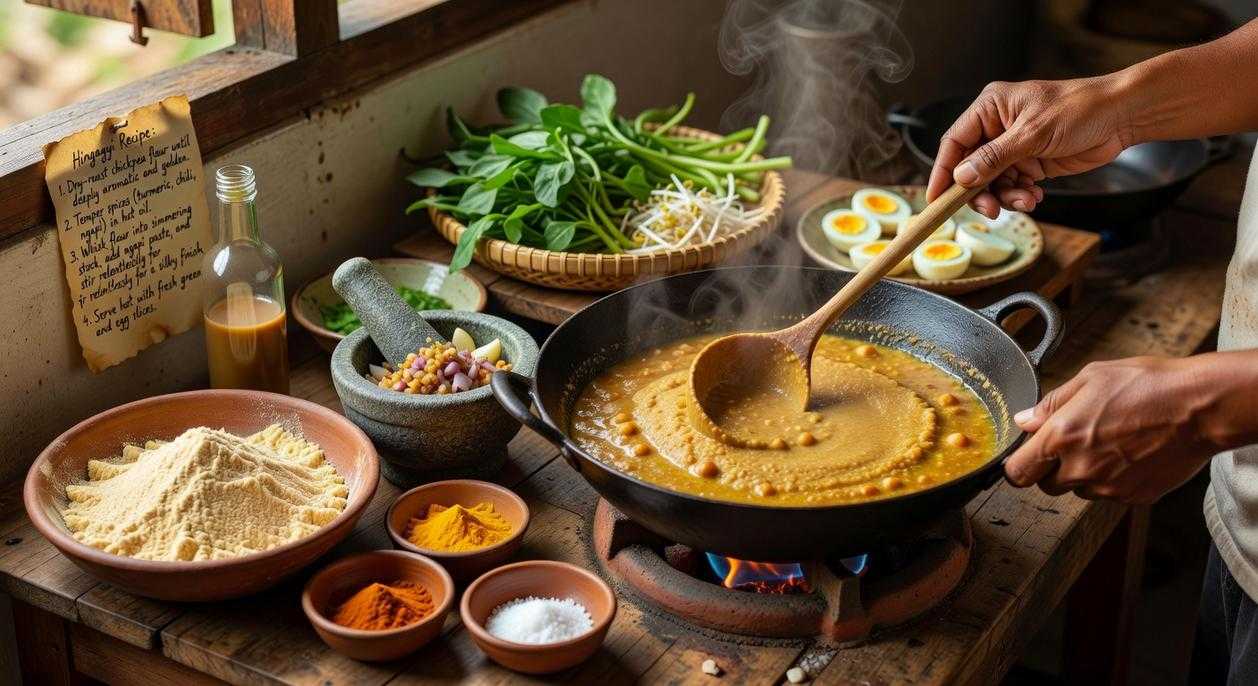
Step 2: Building the Flavor Base
Heat your oil in a wide pot over medium heat.
Add the onions first. Let them soften and turn translucent, which takes about five minutes. Then add your garlic, ginger, and turmeric. Stir constantly for two minutes until the raw smell disappears and everything smells warm and earthy.
This base is where your flavor lives. Rush it and your hingagyi tastes flat.
Step 3: Cooking the Protein
Push the aromatics to the side and add your protein to the center of the pot.
Let it sear for a minute before stirring. You want a little color on it. This adds depth that you can’t get any other way.
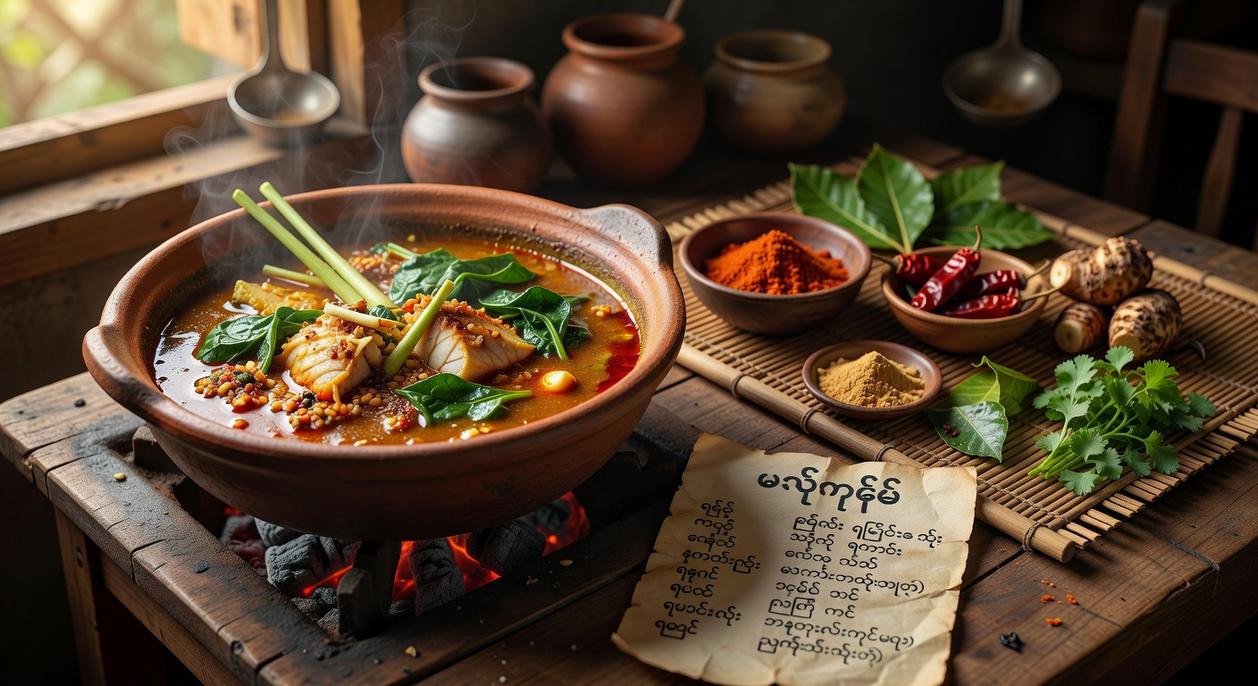
Step 4: The Simmer
Pour in your tamarind water and add a teaspoon of ngapi (or fish sauce if that’s what you have). Add enough water to just cover everything.
Bring it to a boil, then drop the heat to low. Let it simmer for twenty to thirty minutes depending on your protein. Fish needs less time. Chicken or pork needs the full half hour.
The broth should reduce slightly and the flavors should marry together.
Step 5: Finishing with Vegetables
Add your harder vegetables first. Things like eggplant or okra go in with ten minutes left. Calories in Hingagyi picks up right where this leaves off.
Leafy greens or tomatoes? Those go in during the last three minutes. You want them cooked but not falling apart.
Taste your broth. Add salt if it needs it. Add fresh chilies if you want heat.
That’s it. Serve it over rice while it’s still hot.
Kitchen Hacks for Next-Level Hingagyi
You’ve made your first batch of hingagyi and something’s off.
Maybe it’s too sour. Or the ngapi smell hit you like a wall when you opened the jar.
I’ve been there. These are the exact problems I hear about most when people learn how to make hingagyi for the first time.
Getting the Sourness Right
Start with less tamarind than you think you need.
You can always add more at the end. But once you’ve dumped too much in? There’s no going back (unless you want to double your entire recipe).
If it still tastes too sharp, add a pinch of sugar. Not enough to make it sweet. Just enough to round out those edges.
Working with Ngapi
Here’s what nobody tells you about fermented fish paste.
Toast it first.
Put a small amount in a dry pan over medium heat for a minute or two. The pungent aroma mellows out and you get this deeper, richer flavor instead of that in-your-face funk.
Makes a huge difference if you’re new to it.
The Next-Day Secret
Hingagyi tastes better the next day. The flavors need time to sit together and figure things out. I expand on this with real examples in Hingagyi Allkyhoops Burmese.
Store it in an airtight container in the fridge. It’ll keep for three to four days.
When you reheat it, do it slowly over low heat. Add a splash of water if it’s gotten too thick.
How to Serve and Enjoy Your Hingagyi
You’ve just finished cooking. The kitchen smells incredible.
Now comes the best part.
I always serve hingagyi hot in a bowl with freshly steamed jasmine rice on the side. The rice soaks up the rich broth and makes every bite more satisfying.
But don’t stop there.
The Finishing Touches
Top your bowl with fresh cilantro and thinly sliced shallots. Then add a wedge of lime on the side.
That lime wedge? Squeeze it right before you eat. It brightens everything and cuts through the richness in a way that completely changes the dish.
Once you know how to make hingagyi, these simple garnishes turn it from good to something you’ll crave all week.
Bringing Burmese Tradition to Your Table
I created Hingagyi because I wanted to share the flavors that shaped my understanding of Burmese cooking.
Traditional Hingagyi isn’t complicated. But it does require respect for the process and the right ingredients.
You came here to learn how to make Hingagyi the authentic way. Now you have that knowledge.
The beauty of this dish is in its simplicity. When you focus on the core ingredients and follow the traditional techniques, you get flavors that transport you straight to Burma.
I’ve tested this method countless times. It works because it honors the fundamentals that Burmese cooks have relied on for generations.
Here’s what you should do next: Get in the kitchen and start cooking. Gather your ingredients and trust the process. The unique flavors of homemade Hingagyi are worth the effort.
You’ve overcome the challenge of recreating a complex international dish. The technique is in your hands now.
Make it your own and enjoy every bite.
 There is a specific skill involved in explaining something clearly — one that is completely separate from actually knowing the subject. Brianskier Fowlerosa has both. They has spent years working with culinary pulse in a hands-on capacity, and an equal amount of time figuring out how to translate that experience into writing that people with different backgrounds can actually absorb and use.
Brianskier tends to approach complex subjects — Culinary Pulse, Cultural Cuisine Explorations, Global Food Fundamentals being good examples — by starting with what the reader already knows, then building outward from there rather than dropping them in the deep end. It sounds like a small thing. In practice it makes a significant difference in whether someone finishes the article or abandons it halfway through. They is also good at knowing when to stop — a surprisingly underrated skill. Some writers bury useful information under so many caveats and qualifications that the point disappears. Brianskier knows where the point is and gets there without too many detours.
The practical effect of all this is that people who read Brianskier's work tend to come away actually capable of doing something with it. Not just vaguely informed — actually capable. For a writer working in culinary pulse, that is probably the best possible outcome, and it's the standard Brianskier holds they's own work to.
There is a specific skill involved in explaining something clearly — one that is completely separate from actually knowing the subject. Brianskier Fowlerosa has both. They has spent years working with culinary pulse in a hands-on capacity, and an equal amount of time figuring out how to translate that experience into writing that people with different backgrounds can actually absorb and use.
Brianskier tends to approach complex subjects — Culinary Pulse, Cultural Cuisine Explorations, Global Food Fundamentals being good examples — by starting with what the reader already knows, then building outward from there rather than dropping them in the deep end. It sounds like a small thing. In practice it makes a significant difference in whether someone finishes the article or abandons it halfway through. They is also good at knowing when to stop — a surprisingly underrated skill. Some writers bury useful information under so many caveats and qualifications that the point disappears. Brianskier knows where the point is and gets there without too many detours.
The practical effect of all this is that people who read Brianskier's work tend to come away actually capable of doing something with it. Not just vaguely informed — actually capable. For a writer working in culinary pulse, that is probably the best possible outcome, and it's the standard Brianskier holds they's own work to.